
The Mikhak System is the main platform for online consular services for Iranians abroad. This system, aimed at facilitating and expediting consular affairs, has provided easy access to a variety of services. In this step-by-step guide, you will learn how to register a passport issuance request for children under 18 years in the Mikhak system.
Note: If you have not yet registered on this platform, see the Mikhak System registration guide.
Request for Passport Issuance for a Child (Under 18 Years by Father/Paternal Grandfather or Legal Guardian)
Personal Information
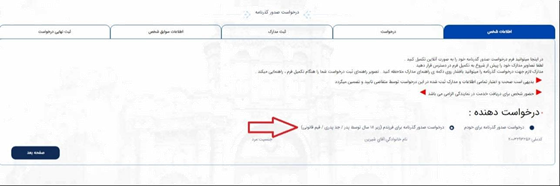
On the first page of the registration request, the identification information of the profile owner (father/paternal grandfather/legal guardian) is displayed. Select the option “Request for passport issuance for my child (under 18 years by father/paternal grandfather legal guardian)” and select the next page key to register the request.
Request
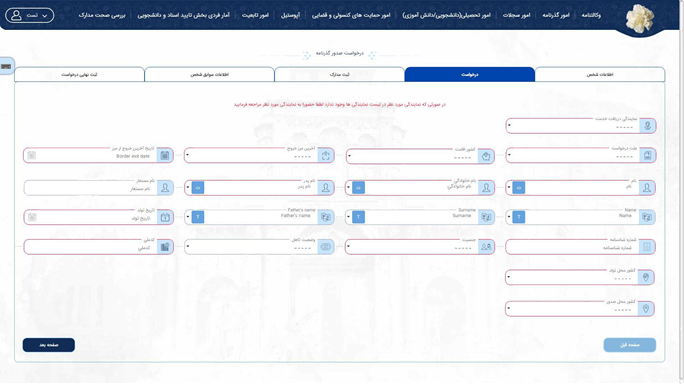
In this page, enter the information of the person under 18 years for whom the passport will be printed. Be careful not to mistakenly enter the father’s (or guardian’s) information in this section.
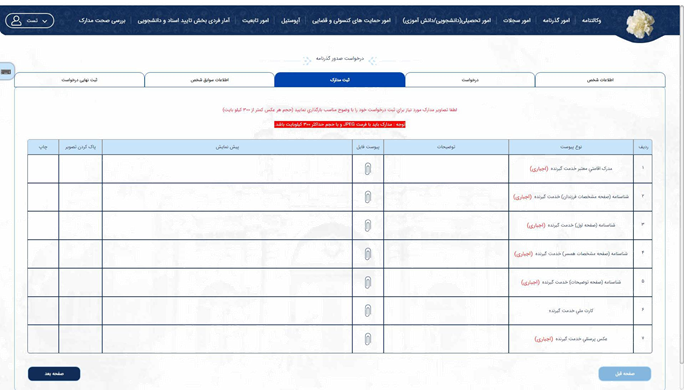
Document Registration
On this page, the applicant must upload the requested documents.
Note: Please upload images of the required documents for your application with appropriate clarity. The applicant must be careful that the size of each photo is less than 300 kilobytes. If you need help resizing digital images, read this guide.
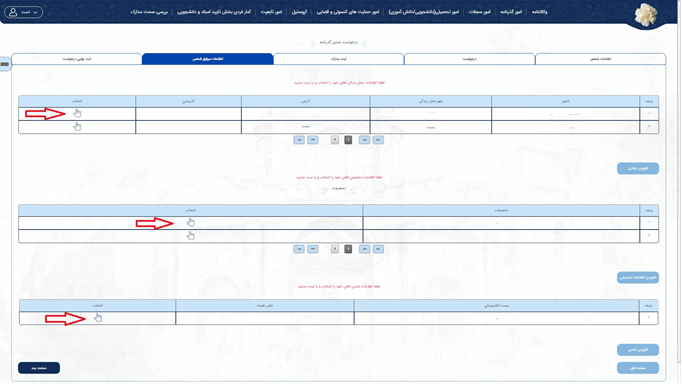
Personal Background Information
This section is for additional information and communication with the applicant and includes three sections: residence information, education information, and contact information. The person’s background information, if previously entered in the system, is displayed and selectable in each section.
Residential Address
On this page, the applicant must select their residence information or register and select a new address by selecting the “Add Address” option.
Educational Background
On this page, the applicant must select their educational background information or register and select new education information by selecting the “Add Education” option.
Contact Information
On this page, the applicant must select their contact information or register and select new contact information by selecting the “Add Contact” option.
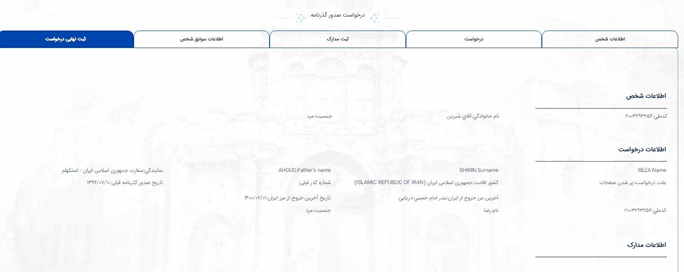
Final Registration of the Request
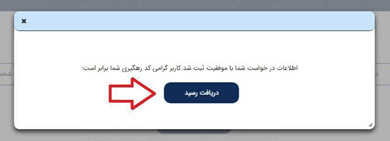
On the last page, the information and documents completed by the applicant are displayed. If the request information is approved and the uploaded documents match the originals, by entering the security code and selecting the final registration key, you can receive the tracking code and the relevant receipt.
After registering the request and receiving an appointment through the appointment system, the applicant must refer to the relevant representative office with the receipt received.