

The Mikhak System is a gateway to the world of consular services for Iranians living abroad. This system, aimed at facilitating and expediting consular affairs, provides easy access to a variety of services. In this guide, you will learn step-by-step the registration process on the Mikhak System and learn important and practical tips for optimal use of this system.
1. Entering the System and Creating a Profile
To begin, enter the Mikhak System at mikhak.mfa.gov.ir.

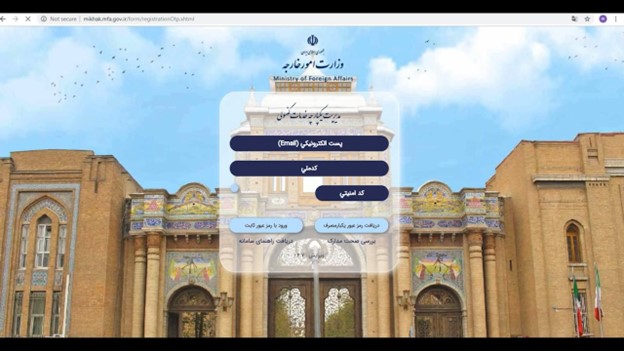
Mikhak System Main Page
Click on the “Login to System” button. In this step, carefully enter your email and national code. After entering the security code, click on the “Receive One-Time Password” button. Note: Use a valid and accessible email address, as information and verification codes will be sent to this address.
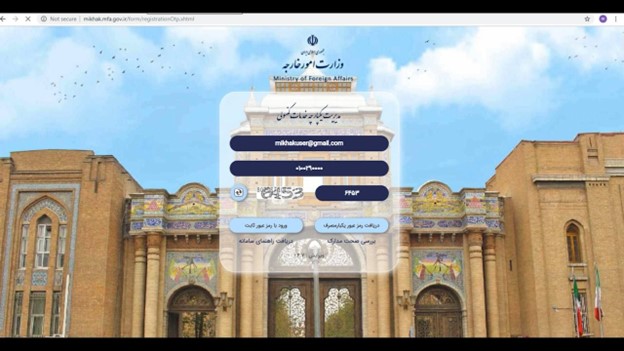
2. Login with One-Time Password
An email containing a one-time password will be sent to you. Enter your email and copy the code. Return to the Mikhak System and enter the code in the “One-Time Password” box. After entering the security code, click on “Login to System with One-Time Password”. Note: The one-time password has a limited validity. If time has passed, request a new password again.
3. Completing Identity Information
In this step, enter your identity information carefully and according to the information on your ID card. Note that completing fields with a red border is mandatory.
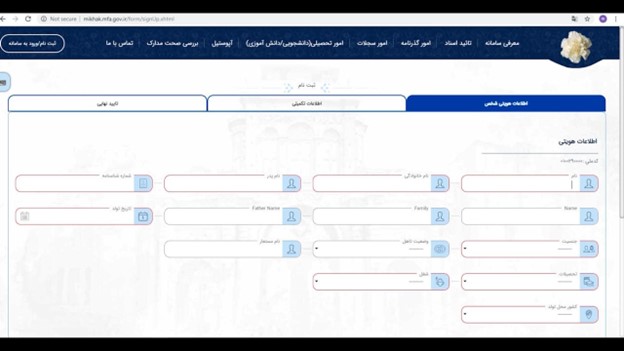
Country, Province and City of Birth: First, select the country of birth. Then select the province and city of birth from the drop-down lists.
Country, Province and Place of ID Card Issuance: Similar to the previous step, select the country, province and place of ID card issuance.
After completing the information, click on “Next Page”.
Important Note: Be very careful in entering identity information. Any mistake can cause problems in receiving services.
4. Completing Supplementary Information and Address
In this section, complete the supplementary information, including residential address, place of residence and contact information, carefully. Note that completing fields with a red border is mandatory.
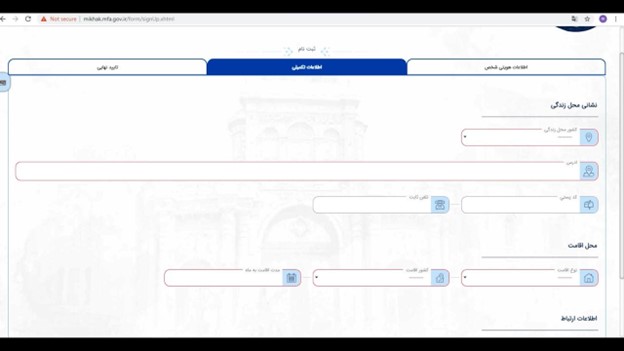
After completing the information, click on “Next Page”. Finally, carefully review the identity information, residential address, place of residence and contact information you entered in the previous steps. If the information is correct, enter the security code and click on “Register Information”. Note: Make sure your phone number and email address are up-to-date and accessible.
5. Final Confirmation of Information
In this step, you will be asked to confirm the accuracy of the entered information. If you are sure of the accuracy of the information, click on “Yes”.
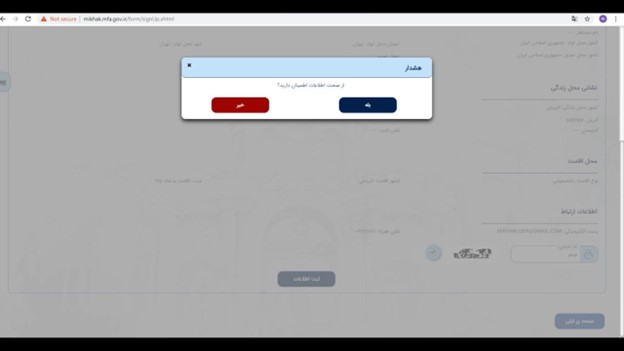
Congratulations! Your profile has been created successfully. You can now use the Mikhak System services.
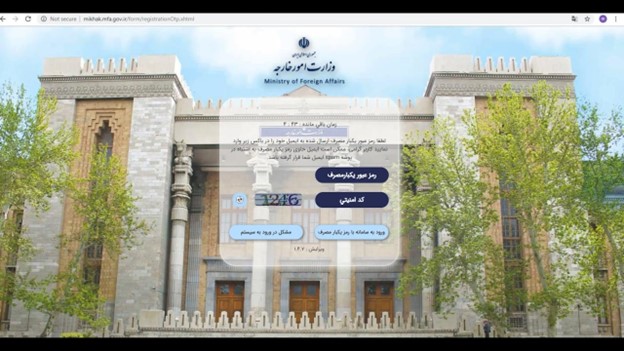
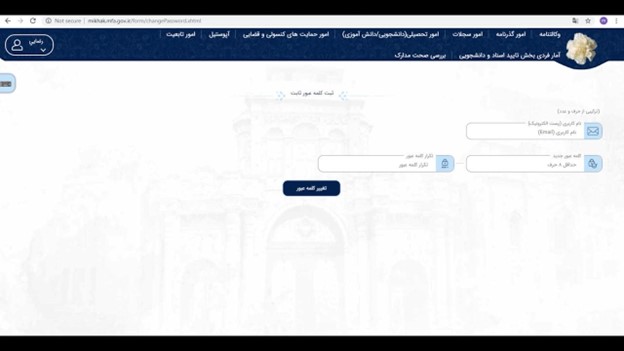
6. Setting a Permanent Password (Optional)
For more convenience in subsequent logins, you can define a permanent password for your user account. To do this, click on the option “If you want to use a permanent password for subsequent logins, click on the option below and enter your email”.
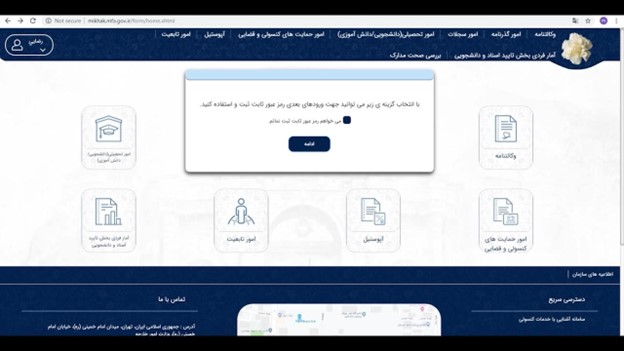
Enter your email. Choose a new password (combination of letters and numbers) and enter it in the appropriate boxes. Finally, click on “Change Password”.
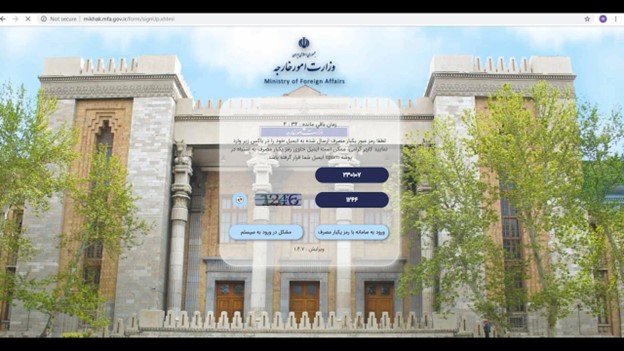
7. Login to System with Permanent Password
From now on, to log in to the system, you can use your permanent password. To do this, click on “Login to System” and then select “Login with Permanent Password”. Enter your email and password and click on “Login”.
Practical Tips
- Prepare the necessary documents before starting registration.
- If you have any questions or problems, you can contact Mikhak System support.
- Keep your account information confidential.
- Visit the Mikhak System regularly and stay up-to-date with the latest news and announcements.
Using this guide, you can easily register on the Mikhak System and benefit from its services.