
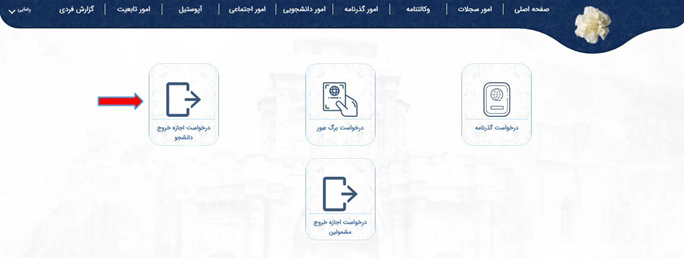
If an applicant wishes to request a student exit permit, they can do so by selecting the “Student Exit Permit Request” option from the Passport Affairs menu. If an applicant wishes to request a conscript exit permit, they can do so by selecting the “Conscript Exit Permit Request” option from the Passport Affairs menu. Both types of requests involve completing several forms that must be carefully filled out by the applicant. After registering the request and receiving an appointment through the appointment system, applicants can refer to the relevant representative office with the received receipt.
Note: The relevant representative office for students residing in Canada is the Interests Section of the Islamic Republic of Iran in Washington, D.C. (located in the Embassy of Pakistan).
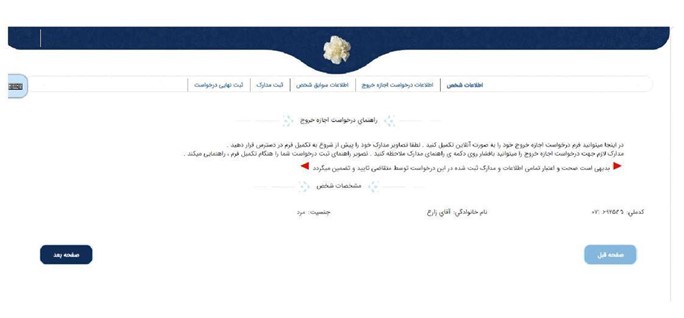
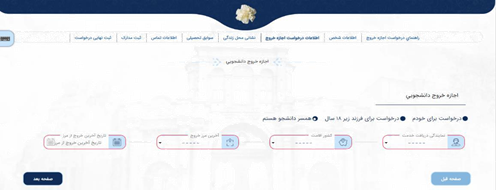
A) Student Exit Permit Request Information
On this page, the applicant must complete their request information. In this section, the applicant can register a student exit permit request for themselves or their child. If the person is a student’s spouse, they must register the request through their own profile (student’s spouse) and activate the “I am a student’s spouse” option.
Request for yourself
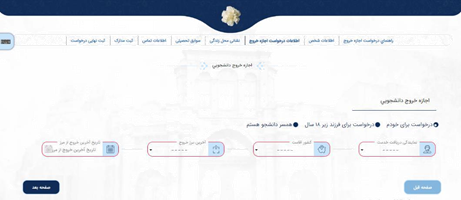
Request for a child under 18 years
Request for a student’s spouse
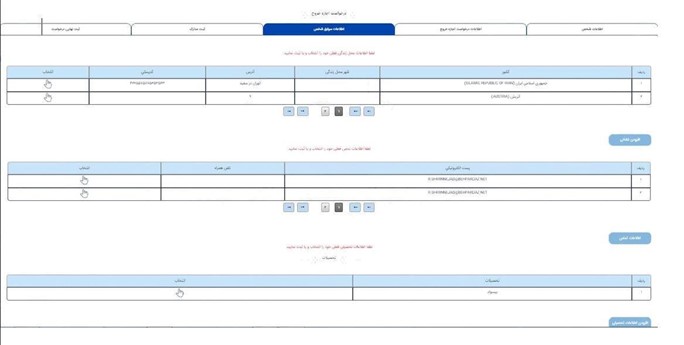
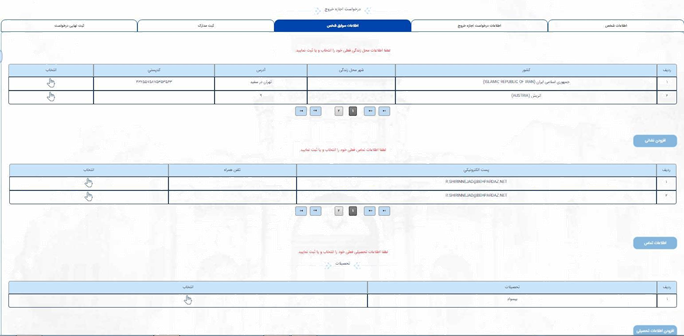
Personal Background Information
This section pertains to additional information and communication with the applicant and includes three sections: Residential Address Information, Education Information, and Contact Information. The person’s background information, if previously entered in the system, will be displayed and selectable in each section.
Residential Address
On this page, the applicant must select their residential address information or register and select a new address by choosing the “Add Address” option.
Educational Background
On this page, the applicant must select their educational background information or register and select new education information by choosing the “Add Education” option.
Contact Information
On this page, the applicant must select their contact information or register and select new contact information by choosing the “Add Contact” option.
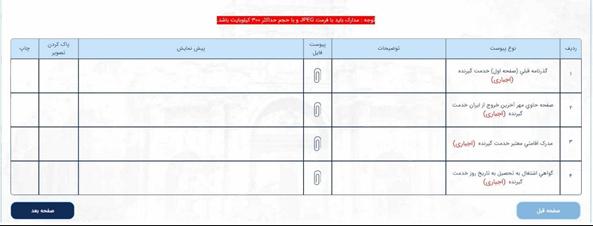
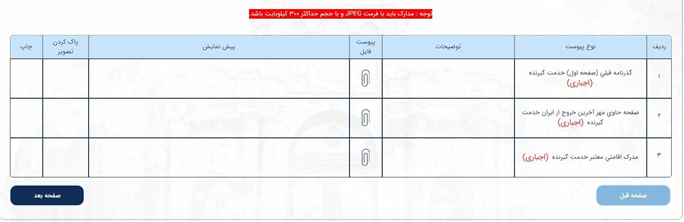
Document Registration
On this page, the applicant must upload the requested documents.
Note: Upload images of the required documents for your application with appropriate clarity. The applicant should ensure that each image is less than 300 kilobytes in size.
Final Request Registration
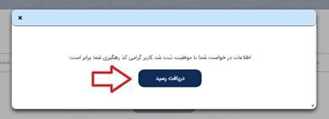
On the last page, the information and documents completed by the applicant are displayed. If the request information is approved and the uploaded documents match the originals, you can obtain a tracking code and receipt by entering the security code and selecting the “Final Registration” button.
After registering the request and receiving an appointment through the appointment system, the applicant must refer to the relevant representative office with the received receipt.

B) Conscript Exit Permit Request
If the applicant wishes to request a conscript exit permit, they can do so by selecting the “Conscript Exit Permit Request” option from the Passport Affairs menu. This request involves completing several forms that must be carefully filled out by the applicant. After registering the request and receiving an appointment through the appointment system, applicants can refer to the relevant representative office with the received receipt.
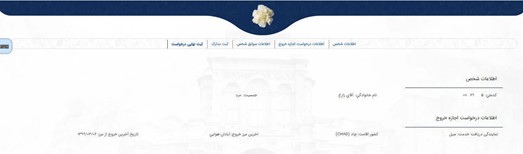
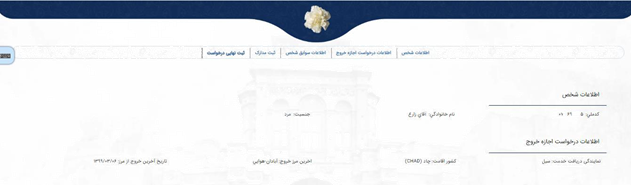
Personal Information
On the first page of the registration request, the person’s identification information is displayed.
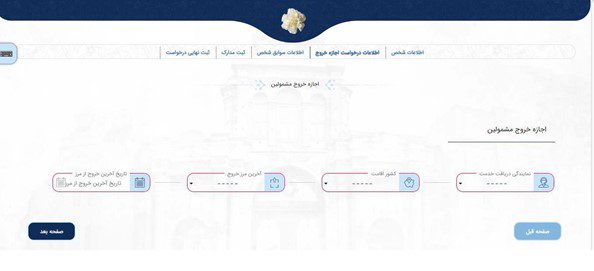
Exit Permit Request Information
On this page, the applicant must complete their request information.
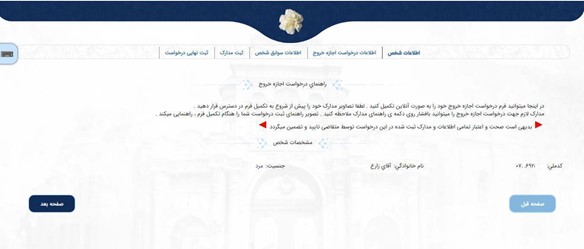
Personal Background Information
This section pertains to additional information and communication with the applicant and includes three sections: Residential Address Information, Education Information, and Contact Information. The person’s background information, if previously entered in the system, will be displayed and selectable in each section.
Residential Address
On this page, the applicant must select their residential address information or register and select a new address by choosing the “Add Address” option.
Educational Background
On this page, the applicant must select their educational background information or register and select new education information by choosing the “Add Education” option.
Contact Information
On this page, the applicant must select their contact information or register and select new contact information by choosing the “Add Contact” option.
Document Registration
On this page, the applicant must upload the requested documents.
Note: Upload images of the required documents for your application with appropriate clarity. The applicant should ensure that each image is less than 300 kilobytes in size.
Final Request Registration
On the last page, the information and documents completed by the applicant are displayed. If the request information is approved and the uploaded documents match the originals, you can obtain a tracking code and receipt by entering the security code and selecting the “Final Registration” button.
After registering the request and receiving an appointment through the appointment system, the applicant must refer to the relevant representative office with the received receipt.